Detailed Value Viewer
The Data Browser displays a sample of table values from the database. This provides very useful information and feedback to the user and masking author.
The default display is generally quite sufficient for typical short data such as numeric values, dates and times, person names, street addresses and so on.
However, there are situations where the data type consists of very long text that can be very difficult for the user to review and assess. For example, JSON and XML records. Although the user can increase the column width, the complex nature of the data can still be difficult to assess at a glance. An example of this is shown below for a JSON column called PersonJson in the default Data Browser window:
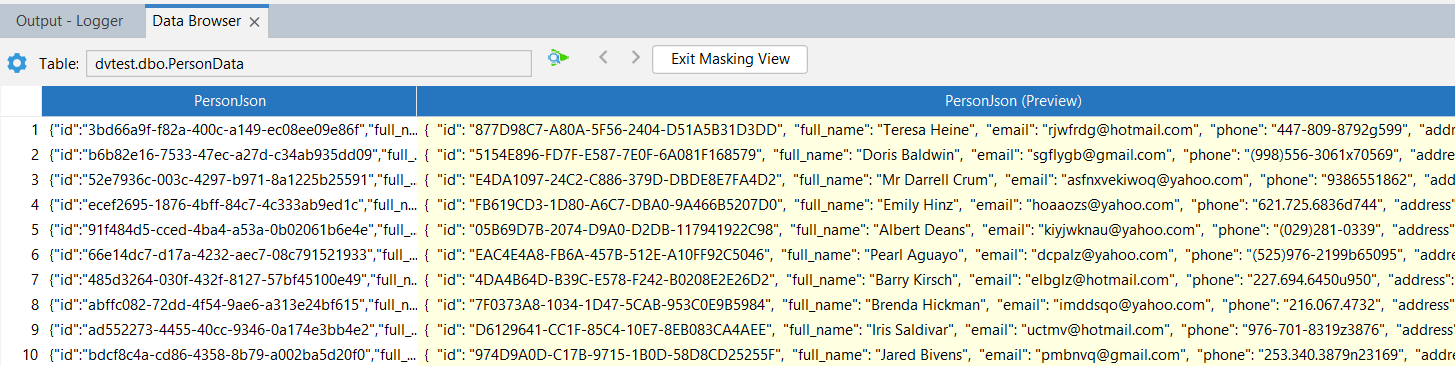
DataVeil therefore provides a Value Viewer that will display the currently selected value in a dedicated detail view window. The Value Viewer can be used in Normal view mode and Masking view mode (that showns Before and After masking values as shown above).
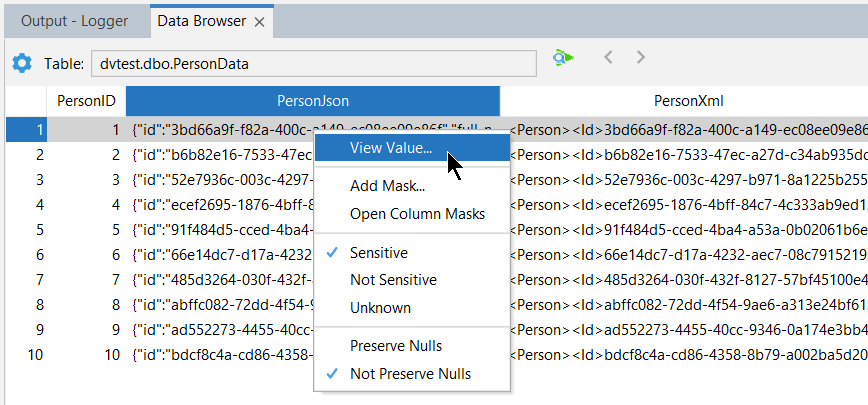
To open a value in the Value Viewer, you can either double-click on the value or right-click on the value and choose the "View Value..." option in the popup menu. The example below shows the the right-click popup menu when in Normal view mode. You can also just double-click on the value and it will automatically open in the Value Viewer.
When the value is loaded in the Value Viewer, DataVeil will automatically detect whether the value can be formatted for a more human-readable display. For example, a JSON record may be stored on the database as an unformatted string as shown below:
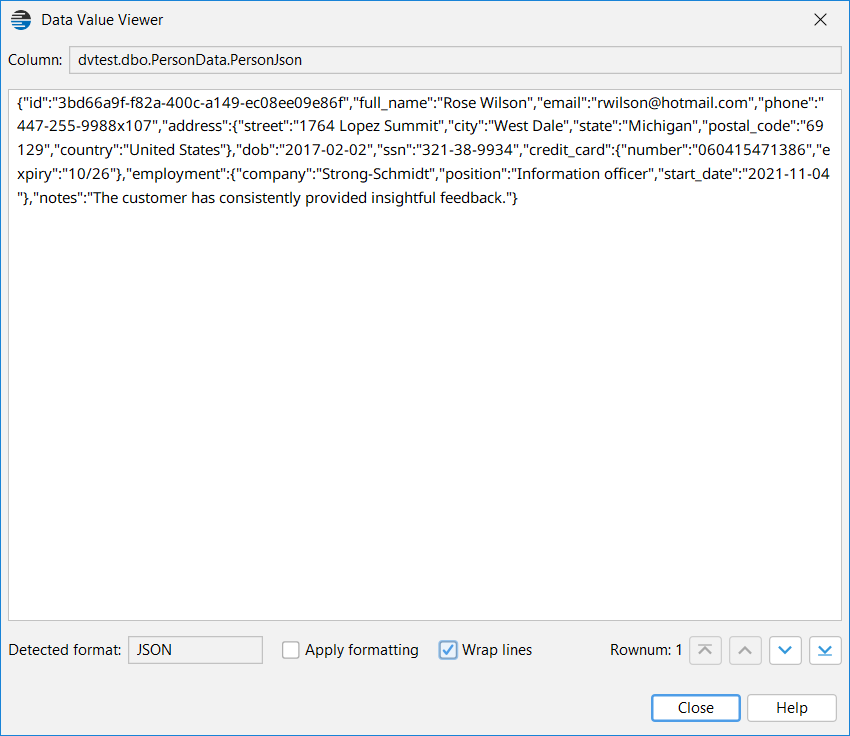
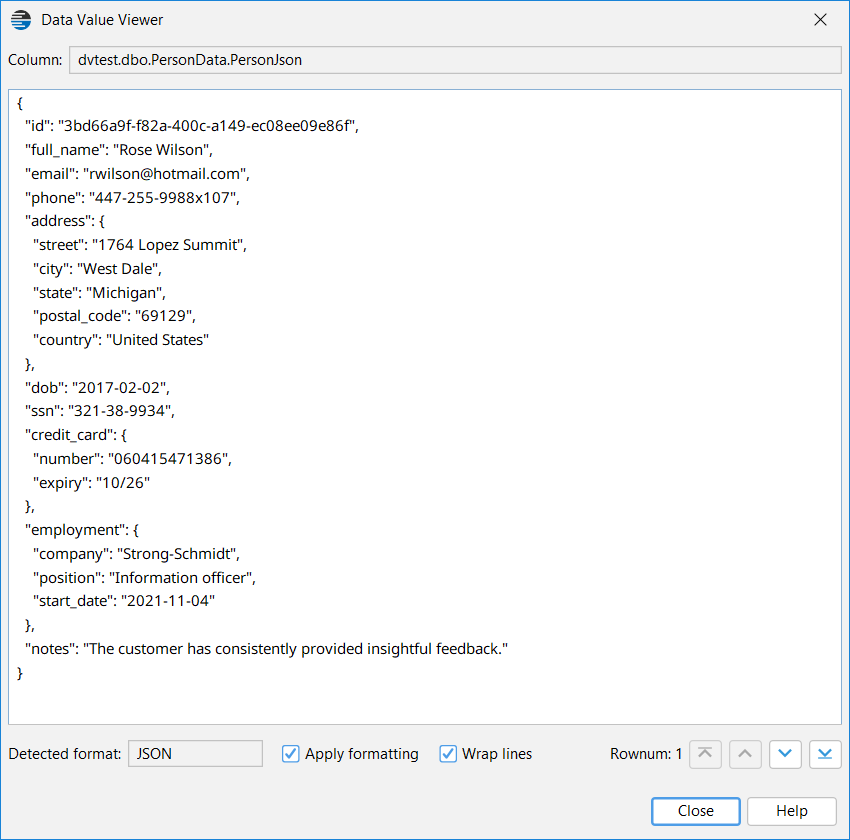
A the botton of the viewer, DataVeil shows that the "Detected format" is JSON and so an option to "Apply formatting" is displayed. An formatting applied is only to the displayed sample, the value on the database is not affected. An example of DataVeil applying formatting to the JSON record above is shown below. Clearly, this is much more user-friendly.
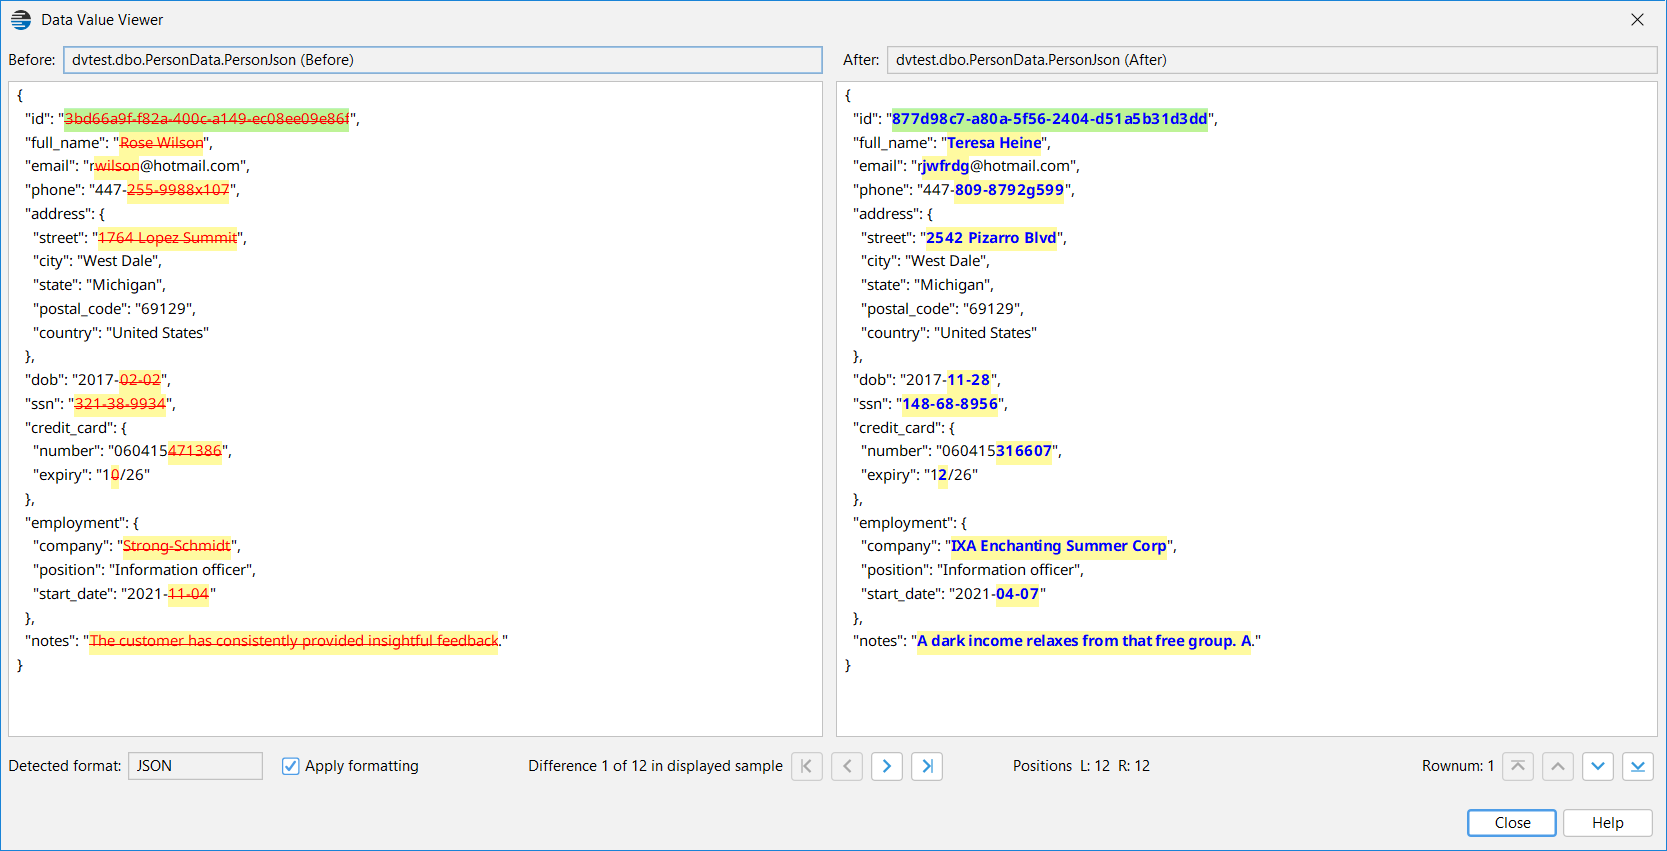
When a value is displayed in the Value Viewer during Masking view mode, DataVeil will show the Before and After values with individual differences highlighted. An example is shown below. This corresponds to the Before and After values shown in the first screen capture at the top of this page.
Important
The Value Viewer processes and displays information according to only the data sample retrieved from the database.
This means that if an insufficiently small character length sample is configured then the format may not be properly detected and fewer or possibly no differences may be detected than actually occur.
For example, if the sample maximum character length is set to 500 characters, and an XML record consists solely of attributes in the first 500 characters then perhaps the XML format will not be detected. Also, if the first masking difference occurs after character 500 then the Value Viewer would display "No differences in displayed sample".
Please refer to Data Browser Settings on how to set larger values for number of rows and maximum character length samples. Please pay particular attention to the General tab and Filter tab on how these character length limits can be set and defaults overridden on a per-table basis.
Options Row
The bottom row of the Value Viewr shows additional information such the Detected format and options whether to apply formating, navigation between differences in the value and navigation to other rows in the Data Browser.
Detected format
If a record format is detected, such as JSON or XML, then the record type name shall be displayed in this field. If no record format is detected then "None" shall be displayed in this field.
Apply formatting
If "Format detected" is not "None" then this checkbox option shall appear. If selected then the viewer will format the displayed value for better readability. For example, a "pretty format" with indentations shall be applied. This formatting is applied only to the value displayed in the viewer. The original value on the database is not affected.
Wrap lines
If this checkbox is selected then lines shall be wrapped to display fully in the viewer instead of long lines scrolling horixontally out of view.
Note: this option is only available in Normal view mode. It will not appear in Masking view mode (when Before and After values are displayed).
Difference X of Y in displayed sample & Navigation buttons
Shows how many differences were found in the displayed sample. The example above shows that 12 differences were found and that the current difference (highlighted in green) is "Difference 1 of 12 in displayed sample".
The navigation buttons enable the user to easily move to the first/previous/next/last difference found. This can be particularly useful for display samples that are hundreds of thousands of characters long and when the differences are sparse.
Note: This shows how many difference were found in the displayed sample. There may be more if the displayed sample length is shorter than the actual value length on the database. Please refer to the "Important" section above.
Positions
This shows the character offests in the Before panel ("L" for left panel) and After panel ("R" for right panel) for the current difference highlighted in green.
Note: These are character offsets in the displayed values. If display formatting has been applied then these offsets may no longer correspond to the exact same offsets as in the stored value on the database; however, they should generally be close. These displayed offsets are intended to give the user an overall understanding of where within a value differences are detected.
Rownum
This shows the current Data Browser row number that corresponds to the value being displayed in the Value Viewer. This is the number shown in column 1 of the default Data Browser window. It has no relation to any row number on the database.
The navigation buttons enable the user to load the first/previous/next/last row in the Data Browser without having to exit the Value Viewer.